This guide basically follows The godot-rust Book but since it says that the “steps are tested and confirmed to work on Linux only”, of course it worries many newbie coders who use Windows like me. Working with Rust is already hard (but safe! and cool!), choosing godot-rust as game engine is quite niche, and then the guide’s tested on Linux only 😱
I will only share what I have tried & don’t think this will apply to all needs, but surely it will help a bit if you want to try as the title says.
Installing prerequisites
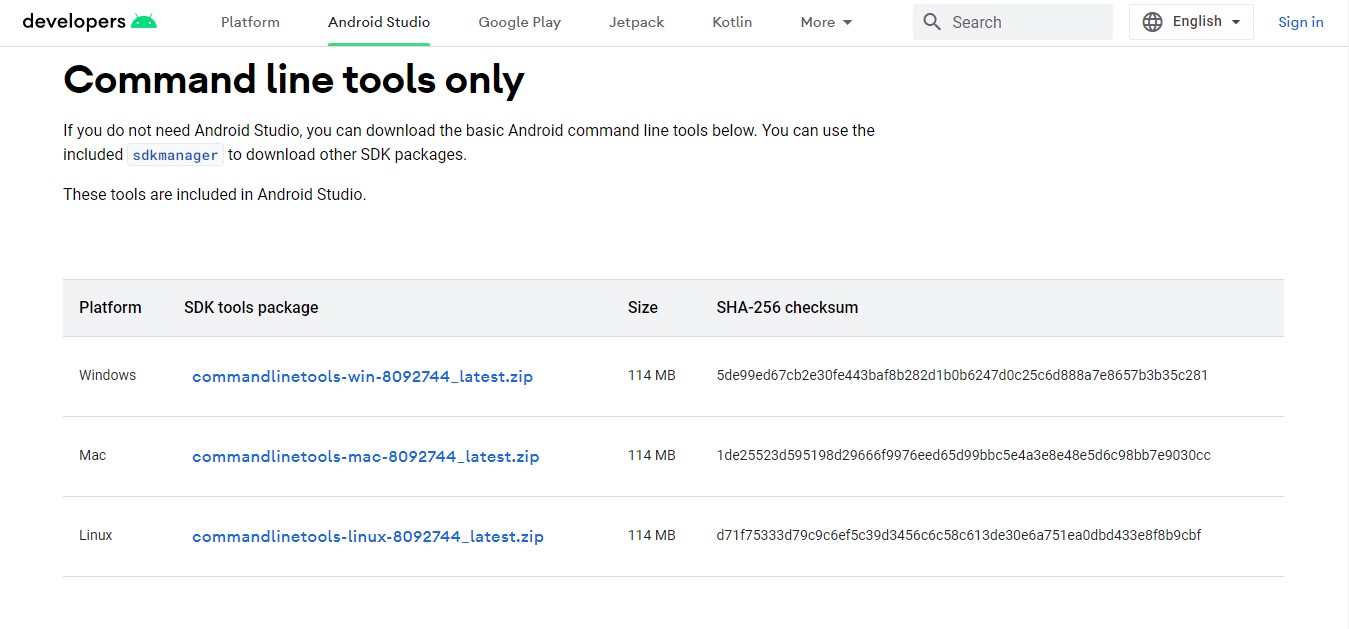
I installed Android SDK without Android Studio. Go to https://developer.android.com/studio#downloads, scrolls a bit and find “Command line tools only”. Choose the Windows one.
Extract the downloaded zip. Inside, we’ll find “cmdline-tools” folder. Rename this folder as “latest “. Then, create these folders/path: “C:\Android\cmdline-tools“. Move the “latest” folder into “C:\Android\cmdline-tools“.
After moving, open “C:\Android\cmdline-tools\latest\bin” in a command prompt or terminal. I use Powershell 7 (x64) in Windows 10. So, adjust the following commands if needed.
Try to run the sdkmanager.bat file in C:\Android\cmdline-tools\latest\bin. I got this error:
ERROR: JAVA_HOME is not set and no 'java' command could be found in your PATH.

Please set the JAVA_HOME variable in your environment to match the location of your Java installation
I haven’t installed “java”, and I guessed it meant JDK (Java SE Development Kit). Download JDK here https://www.oracle.com/java/technologies/downloads/#jdk17-windows. I chose x64 Installer (.exe file).

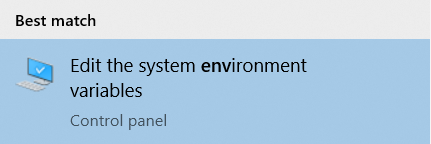
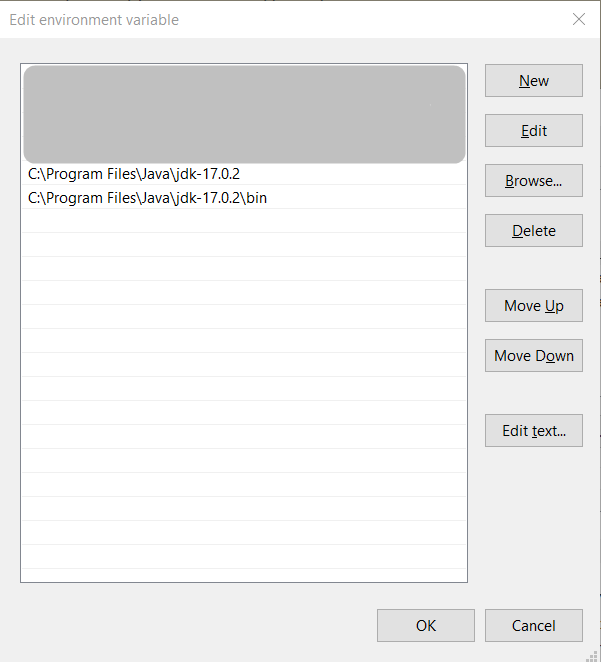
After install (I chose default options), JAVA_HOME or 'java' path is still not set. We have to set it manually in the Windows environment variable settings. For fast access, search “env” in Windows start bar, if you got “Edit the system environment variables”, select that, go to “Environment Variables”, select “Path”, and click “Edit…” button.
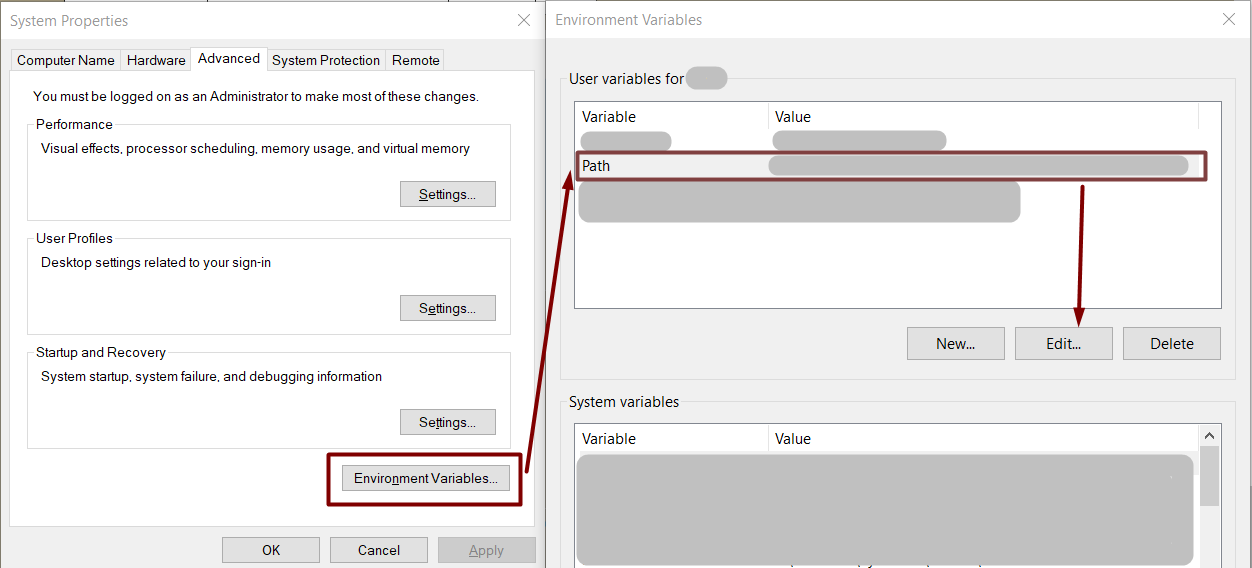
If you chose default options when installing JDK, your Java files should be in something like C:\Program Files\Java\jdk-17.0.2 (your jdk version can be different from mine). Put that folder path into the Path environment variable, also add C:\Program Files\Java\jdk-17.0.2\bin while we’re here, it will help later. Here’s a screenshot of the end result:
After this, when we try to run the sdkmanager.bat, there shouldn’t be any error. Try to run the .bat file. Here’s what I got:
PS C:\Android\cmdline-tools\latest\bin> .\sdkmanager.bat
[=======================================] 100% Computing updates...
PS C:\Android\cmdline-tools\latest\bin>
If you get another error, maybe this one:
Error: Could not determine SDK root.
Error: Either specify it explicitly with --sdk_root= or move this package into its expected location: <sdk>\cmdline-tools\latest\
Then, you haven’t move the folder to “its expected location”. Apparently the expected location of the Android SDK (per 2022-02-13) is “C:\Android\“. That’s why this post stated to move the downloaded SDK folder to C:\Android\cmdline-tools\latest\. I’ve found out about this because of this Stack Overflow answer.
Now go to C:\Android\cmdline-tools\latest\bin\, we’ll want to install several extra tools via sdkmanager. Follow these commands, adjust as needed.
.\sdkmanager.bat --install "ndk;21.3.6528147" --channel=3
.\sdkmanager.bat "platform-tools" "platforms;android-28"
.\sdkmanager.bat "build-tools;32.0.0"
I don’t have any particular reason for the ndk version and build-tools version. The NDK line is copy pasted from sdkmanager | Android Developers. The build-tools is the recent version at the time, found out from using this command: .\sdkmanager.bat --list
UPDATE: Apparently, Godot has stated the minimum version of the tools. Check it here Exporting for Android — Godot Engine (stable) documentation. I was lucky that my NDK version somehow is compatible.
The platform-tools version is the API level of Android 9, my phone’s Android version. Here’s the API level list corresponding to its Android OS version: SDK Platform release notes | Android Developers.
Okay, I didn’t realize it’s gotten this long. And we haven’t passed the first paragraph of the original guide 😂 Maybe, it’d be easier if we just install Android Studio. Anyway, let’s review the guide’s first paragraph:
First, we need to install the Android SDK with NDK enabled. This contains the necessary tools for each architecture. Once the Android SDK is installed, open Editor Settings in the Godot GUI (Editor > Editor Settings > Export > Android) and set the absolute paths to
adb,jarsigner, and the debug keystore (debug.keystore), all of which can be found in the Android SDK installation.
Now open Godot and go to the Editor Settings as told by the guide. For the “Android Sdk Path” we can fill “C:/Android” (I don’t know why it’s not a backslash, just use the explorer dialog if in doubt).
The debug.keystore can be generated using keytool.exe that is fortunately included in JDK. It is located in C:\Program Files\Java\jdk-17.0.2\bin. We’ve already included the path in Environment variable, so we can go to any folder we like & generate the debug.keystore there. This APK is for debugging only & not for releasing in the Play store. Someday, we’ll try that one too.
To generate debug.keystore, we can borrow the line from Godot’s guide on exporting for Android.
keytool -keyalg RSA -genkeypair -alias androiddebugkey -keypass android -keystore debug.keystore -storepass android -dname "CN=Android Debug,O=Android,C=US" -validity 9999 -deststoretype pkcs12Back to Godot GUI, in Editor settings, set the “Debug Keystore” field with the location of debug.keystore we’ve generated before.
Now, follow the original guide and run the rustup commands. I ran only the “aarch64-linux-android” because my phone uses ARM processor.
rustup target add aarch64-linux-android    # for arm64 (64-bit)
rustup target add x86_64-linux-android     # for x86_64 (64-bit)
I skipped the “32-bit targets” section.
I also skipped the “32-bit/64-bit compatible MinGW instance”. I’ve just downloaded it & extracted it in my Downloads folder; that shouldn’t do anything. It’s just occurred to me now that this may be a significant step & maybe I’ve installed something on my machine before that has included this library but I can’t remember. For now, please keep this in mind if you get an error later.
Setting up Cargo
You can follow the steps on the original guide, but somehow I couldn’t find my .cargo/config folder. The .cargo folder was there, but it doesn’t contain config. So, I’ve just added the environment variables. It’s the same as before, but now it’s not the Path. We edit the System variables. Click the “New…” button.
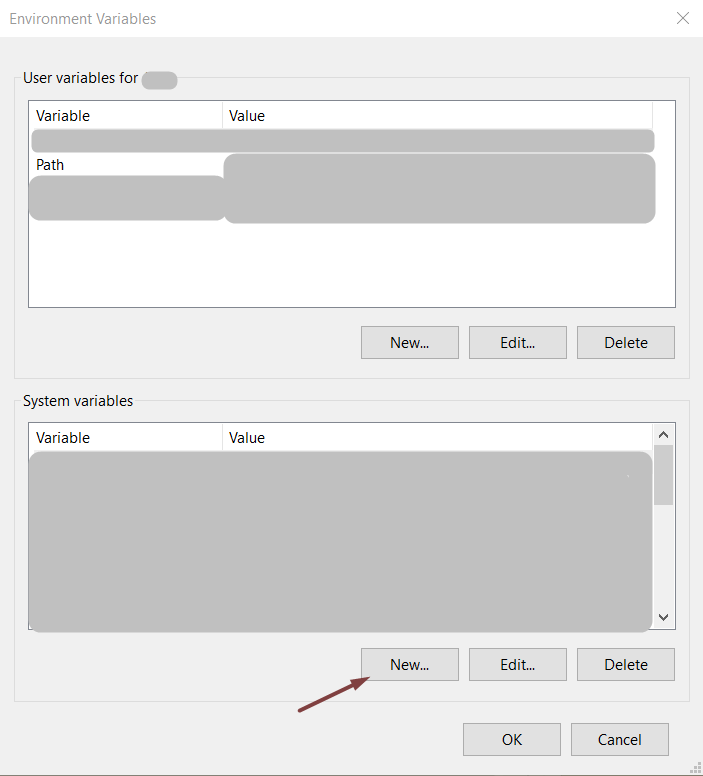
In the following dialog, we can put the Variable name & value accordingly:
For example, the guide tells us to export the following variable:
export CARGO_TARGET_AARCH64_LINUX_ANDROID_LINKER="/usr/local/lib/android/sdk/ndk/21.4.7075529/toolchains/llvm/prebuilt/linux-x86_64/bin/aarch64-linux-android29-clang"
in the dialog before, we can fill the Variable name as: CARGO_TARGET_AARCH64_LINUX_ANDROID_LINKER and the value as (adjusted to Windows path):
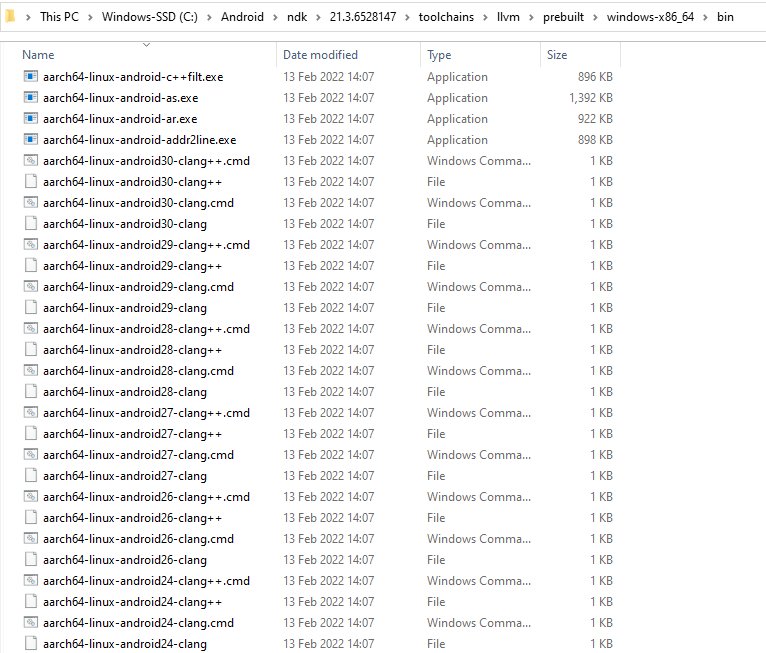
C:\Android\ndk\21.3.6528147\toolchains\llvm\prebuilt\windows-x86_64\bin\aarch64-linux-android28-clang.cmd
Just open the folder C:\Android\ndk\21.3.6528147\toolchains\llvm\prebuilt\windows-x86_64\bin\ in File Explorer & find the version we needed. Since I was targeting aarch64-linux (ARM processor) and Android 9 (API level 28), I chose aarch64-linux-android28-clang (why …-clang? Because the guide uses it). I’ve tried to use the non-cmd file & it didn’t work. So, the full value is using .cmd.
C:\Android\ndk\21.3.6528147\toolchains\llvm\prebuilt\windows-x86_64\bin\. Choose as we need.Setting up environment variables for gdnative-sys
We do the same for this one, adding System variables in Environment variables setting.
Here’s the end result in my computer
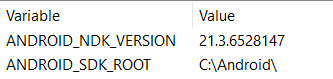
| Variable | Value |
| ANDROID_NDK_VERSION | 21.3.6528147 |
| ANDROID_SDK_ROOT | C:\Android\ |
Building the GDNative library
Since my target was aarch64-linux-android and I want to specify that the Cargo build the lib part of my Rust code (I’ve got a main.rs in the src folder) , I change the following command from the godot-rust guide:
cargo build --release --target x86_64-linux-androidto:
cargo build --lib --release --target aarch64-linux-androidAfter that, we’ve got the .so file. Mine was in target\aarch64-linux-android\release. We can use that in our .gdnlib file in Godot. If you’ve succeeded in incorporating a .dll into .gdnlib, this is the same process but with .so. Details on incorporating the Rust code into Godot is beyond this post, but if you need it, you can start from this post: Godot Rust · Hagsteel.
Exporting
I didn’t realize the godot-rust guide use command line to export. I used Godot GUI. Since I only target aarch64-linux-android, in the Architecture section in Export GUI, I can only check the Arm 64 option.
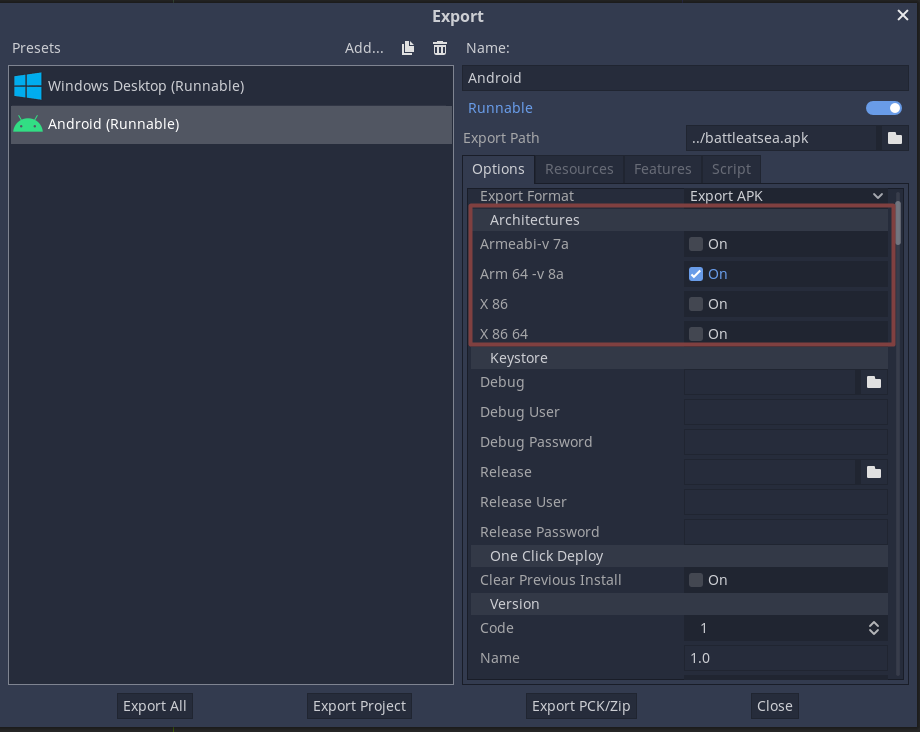
On other options, I used the default because I haven’t explored what it does yet. For now, we can test our game on phone. Good luck!
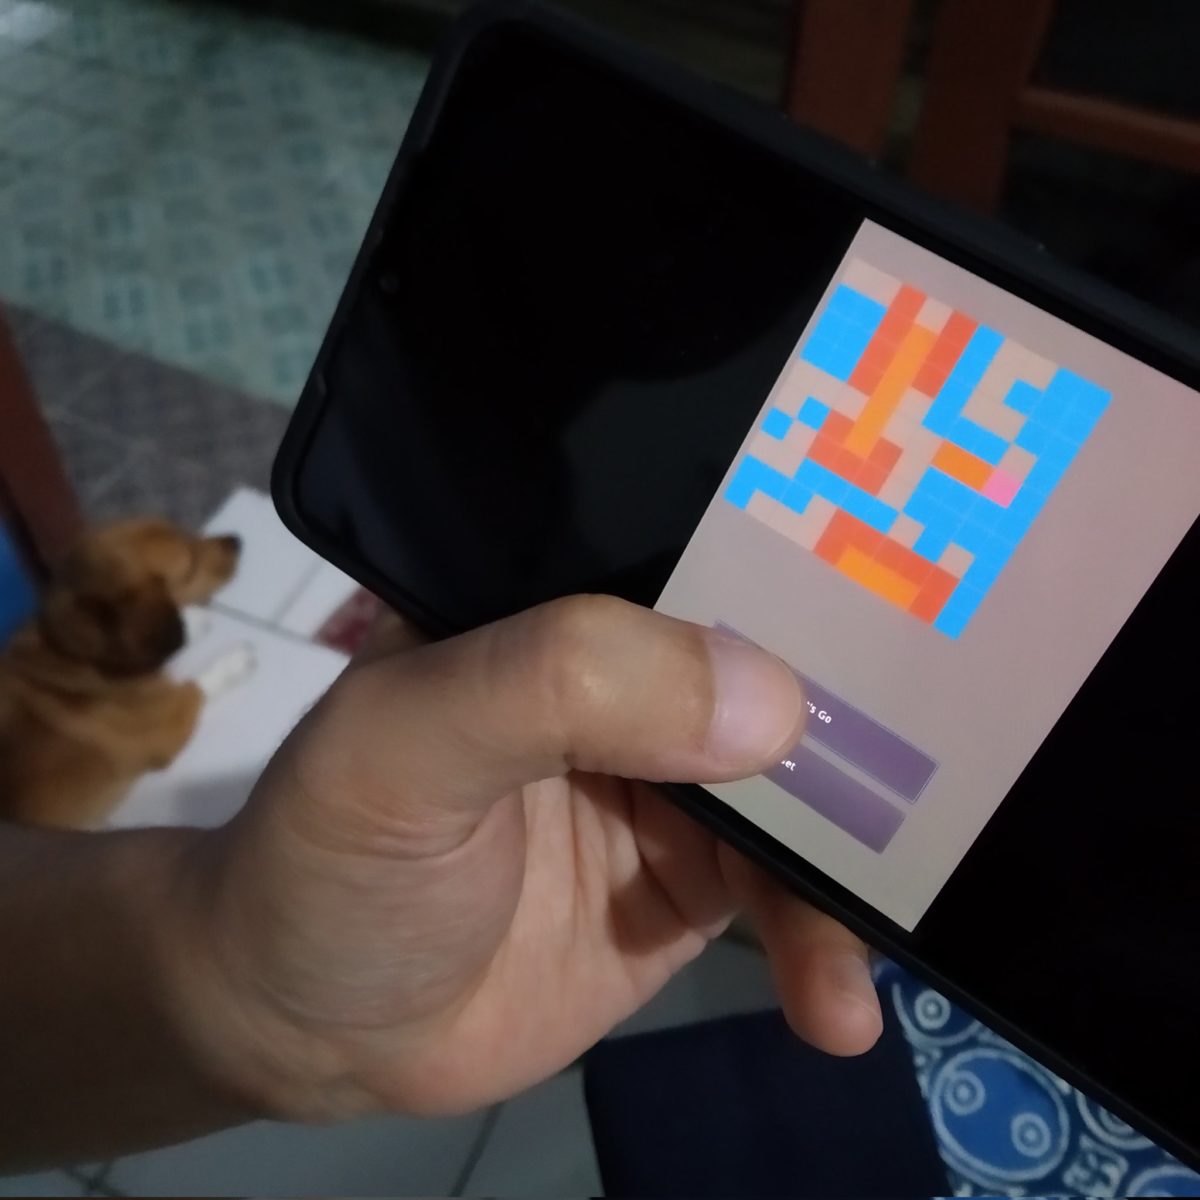
Day 40 #100DaysOfCode
— Coffee, Code, Chemistry (@coffeecodechem) February 13, 2022
On Android! I’m quite nervous for this step because the @GodotRust guide on Android export says it’s not tested yet for Windows. https://t.co/vdkVHndX6J
Sure it needs more configurations but it’s possible. Also, I forgot to configure for portrait mode pic.twitter.com/0XOdfByRZk